
Last Updated: October 29, 2026
Quick Summary
To organize a small kitchen pantry efficiently, empty it shelf by shelf, check dates, and group similar items into zones like baking, cans, snacks and staples. Measure shelf depth, clear height and door clearance before buying storage, then use clear airtight containers, risers and pull-outs to use every layer of height.
- Most standard pantry shelves are around 30-40 cm deep, and anything deeper than about 40 cm becomes a black hole at the back.
- A 30 cm gap fits most cereal and pasta containers, a 20 cm gap suits cans and small jars, and a 15 cm gap is best for spices.
- Load groceries from the back and pull from the front so older food gets used first and nothing expires unnoticed.
- Spend five minutes weekly moving near-date items into a use first box, then do a deeper reset once a month.
- Buy baskets and bins first, clear containers second, and door storage or pull-out racks third.
Table of Contents
- Step 1: Declutter and Empty the Pantry Before You Organize
- Step 2: Group Similar Items and Build Storage Zones
- Step 3: Pantry Storage Ideas for Small Kitchens That Maximise Space
- Step 4: Choose Pantry Storage Containers That Keep Food Visible and Fresh
- Step 5: How to Organise Kitchen Cupboards Around the Pantry
- Step 6: Budget Pantry Organisation Without Compromising on Function
- Step 7: Food Safety, Stock Rotation and Maintenance Routines
- Shop Practical Pantry Storage and Home Organisation Finds
- Frequently Asked Questions
Step 1: Declutter and Empty the Pantry Before You Organize
The fastest way to organise a small kitchen pantry is to start with a clean slate. Pull everything out, shelf by shelf, and put it on the bench or table.
Here's how to run this step:
- Empty one shelf at a time so you never lose track of what you own.
- Check every use-by and best-before date as you go.
- Bin anything expired, stale, or opened months ago.
- Group duplicates together and set aside what you won't use.
- Wipe down the shelves before anything goes back.
A common mistake is skipping the date check. The Food Standards Australia New Zealand guidance on date marks explains the difference between use-by and best-before dates, and it's worth a quick read before you toss anything.
This step sets up everything that follows. A small kitchen pantry only works when it holds food you'll actually eat.
Step 2: Group Similar Items and Build Storage Zones
Once the pantry is empty, sort everything into food categories. This is the core of any pantry organisation system.
A simple starter set of zones:
- Baking supplies: flour, sugar, cocoa, spices
- Canned goods: tinned tomatoes, beans, corn
- Snacks: crackers, biscuits, chips
Think about how you cook, too. Put baking items near where you bake, and snacks at a height kids or visitors can reach.
If your kitchen is tight overall, our guide on how to organize a small apartment kitchen covers zone planning beyond the pantry itself.
Step 3: Pantry Storage Ideas for Small Kitchens That Maximise Space
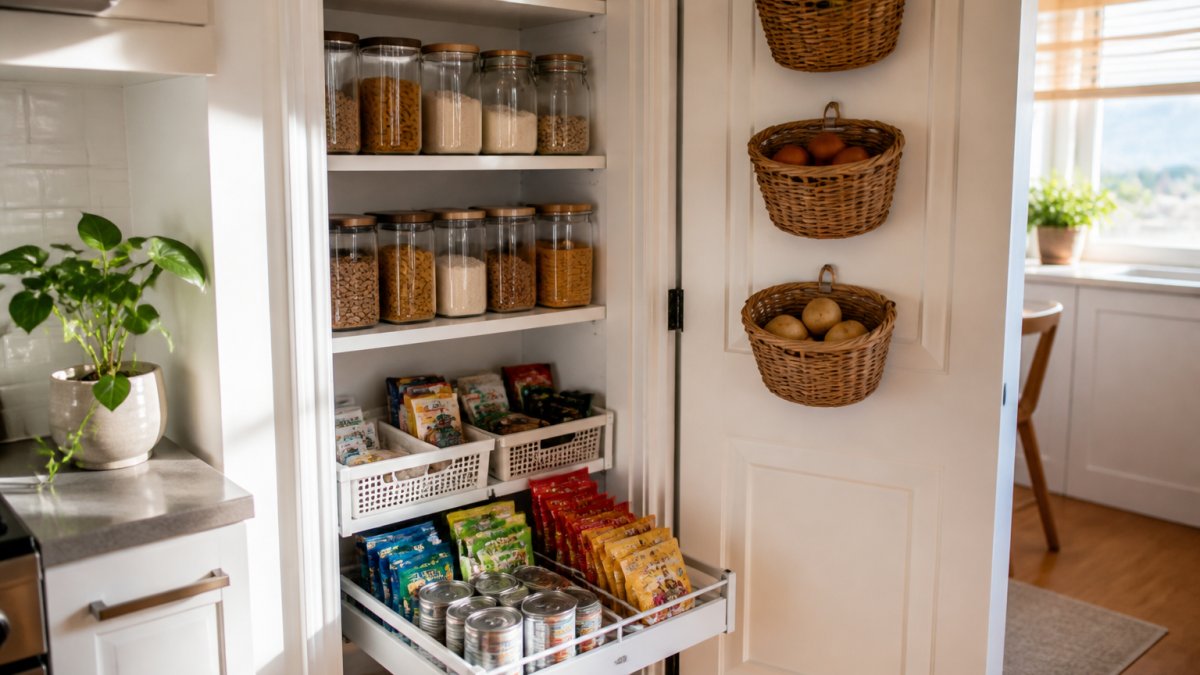
The best pantry storage ideas for small kitchens squeeze function out of every centimetre. You don't need a bigger pantry. You need to use the space you already have, including the parts you've been ignoring.
Measure before you buy anything
Before you buy a single basket, measure each shelf's width, depth and the clear height between shelves. Write the numbers on a sticky note and keep it in your wallet or phone. Three measurements matter most:
- Shelf depth: most standard pantry shelves are around 30-40 cm deep. Anything deeper than about 40 cm becomes a black hole at the back unless you add a pull-out or a turntable.
- Clear height: measure from the shelf surface to the underside of the shelf above. A 30 cm gap fits most cereal and pasta containers; a 20 cm gap suits cans and small jars; a 15 cm gap is best for spices and packets.
- Door clearance: if you add door storage, measure how far the door swings and how much depth the racks can take before they hit the shelves.
Measure first, then buy, so you don't end up with containers that don't fit.
Match the storage to the layout you actually have
Different pantry shapes need different fixes. Here is how to approach the four layouts most small kitchens have:
Deep single shelves (cupboard or closet pantry). The back third is wasted unless you can reach it. Pull-out baskets or sliding trays can bring the whole depth forward. A two-tier riser at the back lifts cans so you can see the labels over the front row. Keep the heaviest items (bulk flour, rice, potatoes) on the lowest shelf and the lightest at eye level.
Narrow pull-out pantry (15-30 cm wide). This is prime space for tall, thin items: oils, vinegars, sauces, foil and wrap, cutting boards, and a slim spice rack.
Corner or L-shaped shelves. The corner itself is the hardest spot to reach, so put infrequently used backup stock there and keep the arms of the L for daily items.
Door-backed pantry. The inside of the door is free vertical space. Slim racks for spices, foil, cling wrap and baking paper work well, but check the door swing first.
Use height in layers, not just stacks
Vertical space is the most underused dimension in a small pantry. Instead of one tall stack of cans, use a step riser so you can see two rows at once. Instead of stacking containers on top of each other, use a shelf insert to create a second level under a tall gap. The rule of thumb: if there is more than about 10 cm of empty air above a row of items, you are wasting usable height.
Estimate capacity before you commit
A quick capacity check stops overbuying. Count the number of shelf gaps you have and estimate how many containers or baskets fit in each. For example, a 60 cm wide shelf with 30 cm clear height may hold two rows of 1-litre containers or one row of taller cereal containers plus a riser. If your planned container set needs more space than you have, buy fewer, larger containers rather than more small ones, fewer lids and fewer gaps to clean.
Measure these three dimensions before buying any storage so your containers actually fit.
| Measurement | Typical value | Note |
|---|---|---|
| Shelf depth | around 30-40 cm | Deeper than about 40 cm becomes a black hole at the back |
| Clear height | 30 cm gap | Fits most cereal and pasta containers |
| Clear height | 20 cm gap | Suits cans and small jars |
| Clear height | 15 cm gap | Best for spices and packets |
| Door clearance | Door swing and rack depth | Check racks do not hit the shelves |
| Wasted height | More than about 10 cm of empty air | You are wasting usable height |
| Narrow pull-out pantry | 15-30 cm wide | Prime space for tall, thin items |
Step 4: Choose Pantry Storage Containers That Keep Food Visible and Fresh
Clear containers can help you see what's inside, which makes it easier to use what you have. Airtight containers also help keep dry goods sealed.
What to look for:
Glass Cold Brew Coffee Pitchers – 2 Pack (1.9 L Each) →
- Clear or see-through material so contents are obvious at a glance
- Airtight lids for flour, sugar, cereal, and pasta
- Stackable shapes that fit your shelf height
Label each container with the food name and the date you opened it. A strip of tape and a marker does the job.
If you want to buy once and buy well, our guide on how to find quality home goods explains what separates durable containers from ones that crack or lose their seal.
Step 5: How to Organise Kitchen Cupboards Around the Pantry
Your cupboards and pantry should work as one system. When you know how to organise kitchen cupboards, the pantry stops becoming an overflow zone.
Split the jobs between them:
- Pantry: bulk dry goods, cans, baking, snacks
- Cupboards: everyday plates, mugs, and the items you reach for daily
- Prime spots: the easiest-to-reach shelves go to whatever you use most
Keep backup stock in the pantry and daily-use items in the cupboard nearest the bench. That way you're not rummaging mid-cook.
One insider tip: leave a small gap on each shelf. A pantry packed to the edges is harder to keep tidy than one with breathing room.
Step 6: Budget Pantry Organisation Without Compromising on Function
You can organise a pantry well without spending much. Budget pantry organisation comes down to buying a few multi-purpose items instead of a long list of single-use gadgets.
A practical order of spending:
- Baskets and bins first. They contain the most clutter for the least money.
- Clear containers second. Buy a matching set for your most-used dry goods.
- Door storage and pull-out racks third. Add these once the basics are in place.
Before buying, measure your shelf height, depth, and width. A container that doesn't fit is money wasted. Repurpose jars and boxes you already own where you can.
When you're ready to add pieces, our curated collection of home organisation finds covers practical storage without the novelty clutter.
Step 7: Food Safety, Stock Rotation and Maintenance Routines
An organised pantry stays organised only if you maintain it. The trick is rotation. When you unpack groceries, put new items behind the older ones. Older food gets used first, and nothing quietly expires at the back.
Build a first-in, first-out system that actually works
First-in, first-out (FIFO) is the same principle commercial kitchens use, scaled down for a home pantry. The mechanics are simple:
- Load from the back. When you bring groceries home, slide the new packet behind the existing one on the same shelf.
- Pull from the front. Take the front item first, every time.
- Keep a "use first" box. Anything close to its date goes into a small labelled box at eye level so it gets eaten before it expires.
- Date what you open. Write the opening date on containers of flour, cereal, pasta and spices. Once opened, some dry goods are best used within a few months, so check the packaging for guidance.
Know which date mark means what
Use-by and best-before dates are not the same thing, and treating them as interchangeable causes waste or risk. A use-by date is about safety, food should not be eaten after it. A best-before date is about quality, the food is still safe but may have lost some texture or flavour. The Food Standards Australia New Zealand guidance on date marks sets out the difference clearly.
Store food so it lasts
A few storage rules make rotation easier and food safer:
- Keep the pantry cool and dry. Heat and direct sunlight shorten shelf life, so avoid shelves next to the oven, dishwasher or a sunny window.
- Seal dry goods properly. Flour, sugar, cereal and pasta last longer in airtight containers than in open packets, and sealing also keeps pests out.
- Keep raw and ready-to-eat items separate. Store raw meat, fish and poultry on the lowest shelf of the fridge, not the pantry, and never above ready-to-eat food.
A weekly five-minute routine beats a yearly overhaul
A monthly reset helps, and a short weekly check can keep the pantry from drifting. Pick a day, bin night works well, and spend five minutes:
- Move anything near its date into the "use first" box.
- Put stray items back in their zone.
- Wipe any sticky shelf or container.
Then once a month, do a deeper reset:
- Check dates and clear anything past its use-by.
- Wipe shelves and containers.
- Re-sort anything that drifted out of its zone.
For official storage advice, check the Food Standards Australia New Zealand food safety guidance.
Shop Practical Pantry Storage and Home Organisation Finds
Measure your space, sort by zone, choose clear containers, and set a monthly reset.
At Oddities & Ends, we curate practical home finds with Australia-wide delivery and free delivery across Australia. If you're looking for storage that fits your space, browse our range and see what suits your shelves.
Frequently Asked Questions
How do you organise a small kitchen pantry when you have very little shelf space?
Start by emptying the pantry and grouping similar items together so you can see what you actually have. Use vertical space with stackable clear containers and add door storage for smaller items like spices and snacks. Keep frequently used items at eye level and reserve higher shelves for bulk or occasional items. Measuring your shelf height and depth helps you choose storage that fits.
What containers are best for pantry storage containers in a compact layout?
Clear, stackable containers work best because you can see what is inside without pulling everything out. Square or rectangular shapes use shelf space more efficiently than round ones. Choose containers with airtight lids for flour, rice and cereals to keep them fresh, and smaller containers for snacks and baking supplies. Label each container with the contents and date so stock rotation stays simple.
How do you organise a pantry without buying anything new?
Empty the pantry completely, wipe the shelves, and sort items into categories such as baking, canned goods, snacks and drinks. Use existing jars, mugs, shoeboxes or takeaway containers as improvised bins. Place the most-used items at eye level and group similar foods together. Move rarely used appliances or bulk items to higher shelves. Once you know your exact shelf measurements, you can decide whether any new storage is genuinely needed.
How often should you declutter and reset a small pantry?
Do a quick five-minute tidy weekly, checking for expired items and putting stray packets back into their zones. A deeper declutter every three to six months works well for most households. During the deeper reset, remove everything, check use-by dates, wipe shelves and review whether your storage zones still match how you cook.
Ready to make your pantry work harder? Get started with Oddities & Ends and find practical storage that brings calm to your kitchen, delivered free to your door.
